Free Standing Patio Cover Kits vs Custom Build: Compare Costs
The lowest-cost route isn’t always the one with the simplest kit. In the free-standing patio cover kits vs. custom build comparison, kits may reduce design and fabrication work, while a custom build can be tailored to a specific yard or house layout. Materials, footing work, and assembly all affect the total. The project price depends on the design, materials, site conditions, and installation scope, and is provided after a quote request.
When weighing a kit, look beyond the parts list. A freestanding cover needs to work in its intended spot, whether close to the house or over a separate seating area, and suit local weather conditions.
This guide compares cost factors, installation effort, placement, climate considerations, and DIY difficulty to help you decide which approach fits your project. Use the practical criteria below to weigh the tradeoffs.
Key Takeaways
- Compare the full project scope, not just the kit price: footing work, materials, and assembly can change which option is more economical.
- Choose between attached and freestanding based on where you need shade and how each structure will support its load.
- Match the design and anchoring approach to local weather demands, including heat, wind, and seasonal conditions.
- Before deciding to build it yourself, weigh your construction experience alongside foundation planning and any applicable property requirements.
Can a freestanding patio cover be placed close to the house?
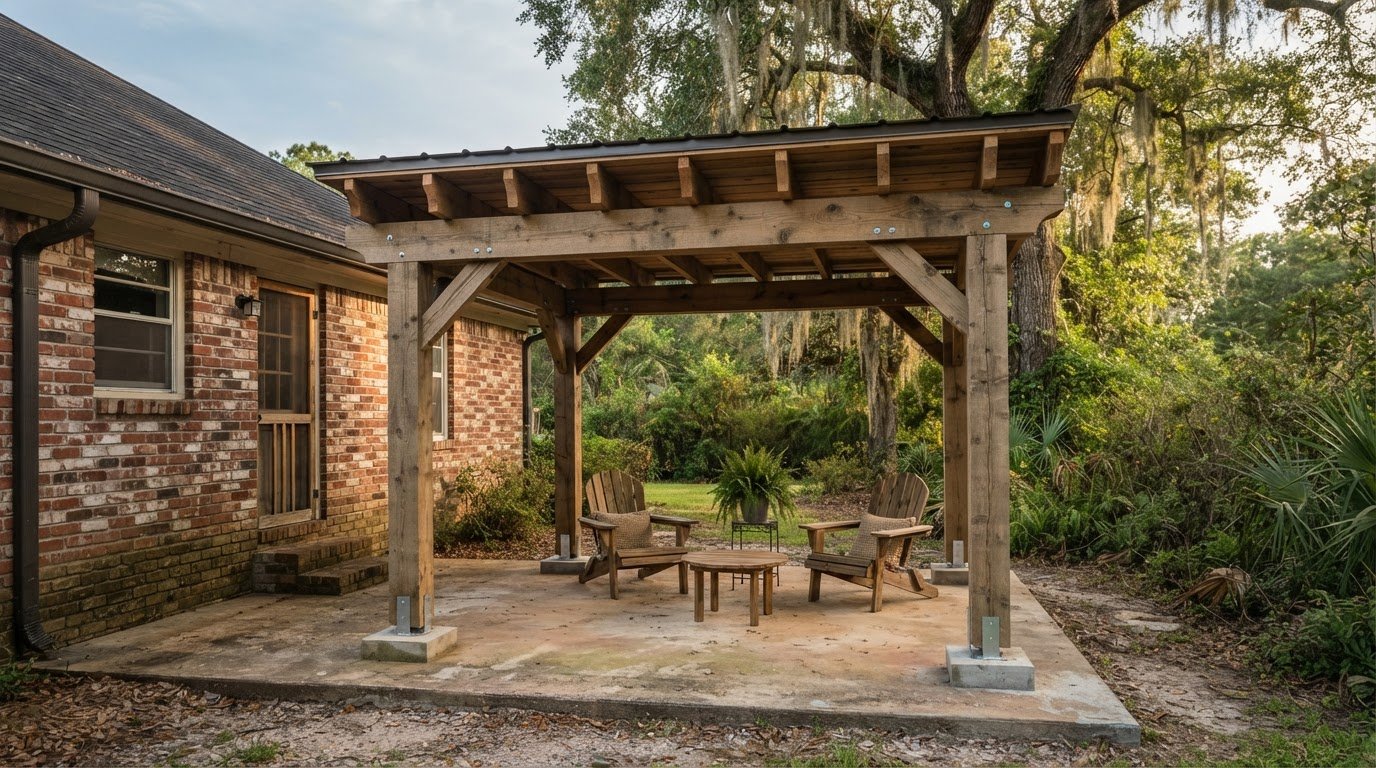
Yes. A freestanding patio cover can sit close to a house, including where the roofline makes attachment less practical. Its columns, beams, and footings support the structure independently. An attached cover transfers some of its load to the home, so the connection needs to reach sound framing and provide appropriate support.
The distinction matters with kits, too. A freestanding aluminum or vinyl pergola kit stands on its own supports; an attached kit depends on a secure house connection. Either can create shade near the home, but a freestanding design requires carefully planned footings, while an attached design requires a sound connection and attention to runoff.
Materials affect durability and upkeep. Polycarbonate patio-cover panels typically have a service life of 15-25 years when correctly installed. Pressure-treated pine pergolas typically last 10-15 years before major repairs, while cedar or redwood pergolas can last 15-20 years with regular care. A custom build can be tailored to the site, but material alone doesn’t determine performance.
Maintenance and repair costs depend on the material, damage, and access; the price depends on the case and is given after a quote request. Warranty terms depend on the kit maker or builder, so compare what each written warranty covers before choosing.
Kit dimensions and materials vary by model. Examples include 10×12 footprints, aluminum or vinyl pergola kits, wood pergolas, and polycarbonate patio-cover kits. Roof configuration also varies, so match the kit’s design to the coverage you need rather than assuming every style comes in every material.
| Option | Load support | House placement | Customization |
|---|---|---|---|
| Freestanding kit | Own columns, beams, and footings | Can sit near the house | Set by kit dimensions and design |
| Attached kit | Shares load with house framing | Connects directly to the home | Limited by kit and connection details |
| Custom build | Designed for its support conditions | Can be planned for the site | Can be tailored to layout and materials |
Choose freestanding when independent support or flexible placement matters most. Choose attached when a direct connection and continuous shade beside the home suit the site.
Cost differences and installation complexity
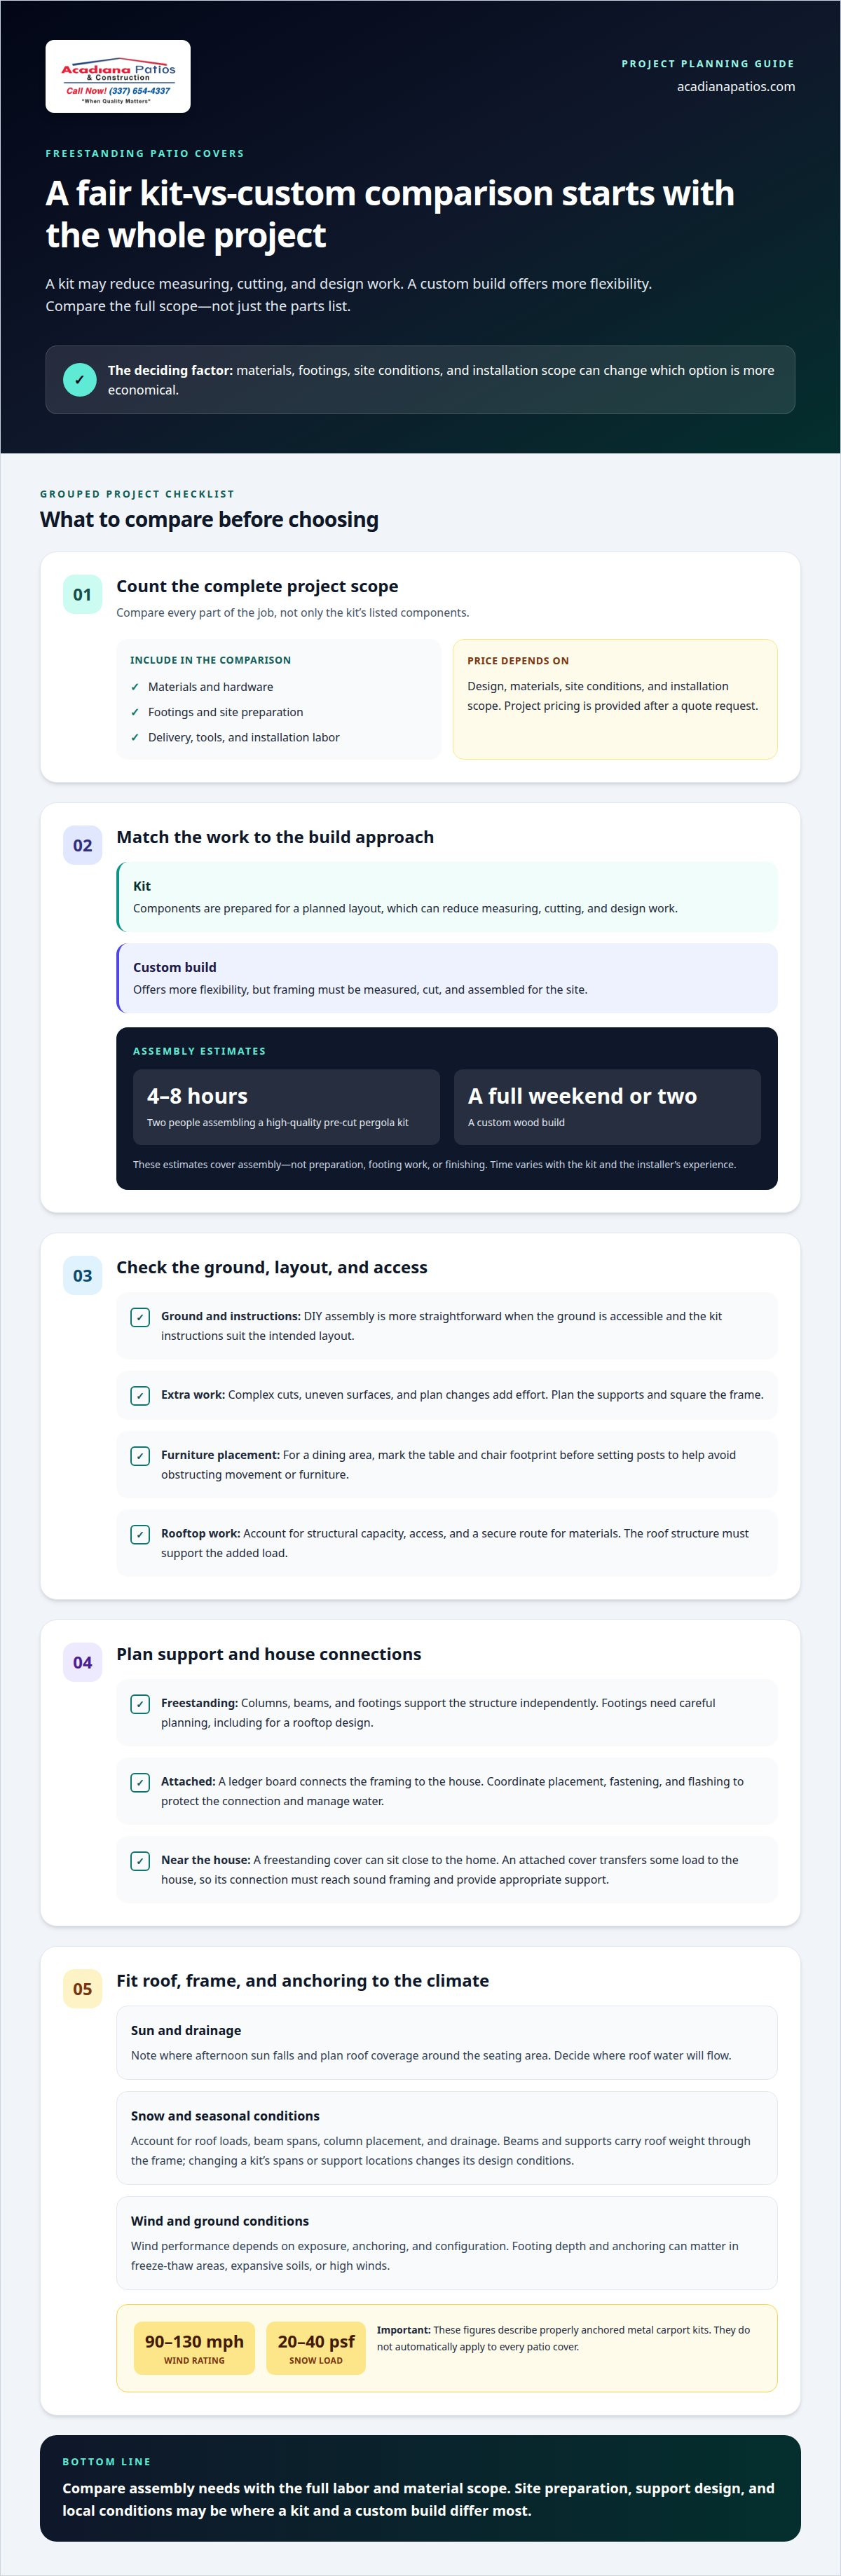
A kit can reduce measuring, cutting, and design work because its components are prepared for a planned layout. A custom build offers more flexibility, but its framing must be measured, cut, and assembled for the site. The choice between free-standing patio cover kits and a custom build depends on the full project scope. Compare materials, hardware, footings, delivery, tools, and installation labor, not just the parts list.
Assembly time varies with the kit and the installer’s experience. Two people can assemble a high-quality pre-cut pergola kit in 4-8 hours. A custom wood build can take a full weekend or two. Those estimates cover assembly, not preparation, footing work, or finishing. For a DIY project, plan each step, from laying out supports to squaring the frame.
DIY assembly is more straightforward when the ground is accessible and the kit instructions suit the intended layout. Complex cuts, uneven surfaces, and plan changes add work. For a dining area, mark the table and chair footprint before setting posts. This helps position the pergola without obstructing movement or furniture.
Rooftop pergolas require additional access and structural planning. The roof structure must support the added load, and materials need a secure route to the work area. An attached design uses a ledger board to connect the pergola framing to the house. Coordinate its placement, fastening, and flashing to protect the connection and manage water. Freestanding rooftop designs also need stable support at each column. Compare free-standing patio cover kits with a custom build by accounting for these site-specific demands.
Project cost depends on design, materials, site conditions, and installation scope, and is provided after a quote request. Compare the kit’s assembly needs with the full labor and material scope of a custom build. A free-standing patio cover kit versus a custom build may differ most in preparation and site-specific framing. For project-specific planning, consider how the layout, framing, and site preparation fit together with custom patio-cover planning.
Heat, snow, wind, and seasonal climate considerations
Consider climate when planning the roof, frame, and anchoring. For a hot outdoor space, note where afternoon sun falls and how roof coverage will shade the seating area. A cover over a dining spot may need different placement from one shading a walkway. Roof design also affects drainage, so plan where water will flow from the outset.
Snow presents a different design concern. In snowy or mixed-season climates, account for roof loads, beam spans, column placement, and drainage. Snow load affects more than the roof panels: beams and supports carry the weight through the frame. A kit’s stated capacity applies to its specified configuration, so changing spans or support locations changes the design conditions.
Wind engineering links the roof, frame, anchors, and footings. Properly anchored metal carport kits may be rated for winds of 90-130 mph and snow loads of 20-40 psf. Those figures apply to the described carport kits, not automatically to every patio cover. Wind exposure, anchoring, and the kit’s configuration all matter when evaluating a specific structure.
For a freestanding cover, footing depth and anchoring methods can affect long-term performance in areas with freeze-thaw cycles, expansive soils, or high winds. Identify the site’s exposure and ground conditions, then plan supports accordingly. In a snowy region, account for drainage and roof loading; in a high-wind location, consider how the anchors connect the frame to its footings.
- Heat: Position shade around the outdoor area’s use and sun exposure.
- Snow: Account for roof loads, spans, columns, and drainage.
- Wind: Evaluate the complete engineered system, including anchors and footings.
Choose a kit only when its design and installation conditions suit the site. Otherwise, a custom design can address climate demands through coordinated decisions about the roof, framing, and supports.
Can I Really Build a Patio Cover Myself With No Construction Experience?
A kit can make assembly more approachable, but planning still matters. Start with the proposed footprint, roof style, and support locations. Then contact your local building department to learn which permit and plan requirements apply. Requirements depend on location and design, so establish them before ordering materials or digging footings.
Homeowners’ association rules are separate from building department requirements. Review the applicable documents for limits on placement, appearance, and exterior changes, and complete any required approval process before construction. For example, a cover beside an outdoor kitchen can affect the yard’s layout and visible exterior. Settle the location first so the design and foundation plan suit the space you intend to use.
Foundation planning is a key DIY challenge. Mark each column location, check that the layout is square, and align the supports with the kit instructions. Freestanding structures rely on their own columns, beams, and footings, so the foundation must suit the design and site. Sloped or uneven ground can complicate the layout. A concrete slab also needs to align with the planned post positions rather than obstruct them.
- Before buying: Ask the building department about permit and plan steps for your proposed design.
- Before digging: Review HOA requirements and mark the final cover footprint.
- Before assembly: Check the kit instructions against the site, footing layout, and available tools.
Comfort depends on a sound layout as much as the finished roof. If the project combines a patio cover with an outdoor kitchen, coordinate the structure’s supports with the cooking and seating areas. A DIY kit may suit a straightforward site and an experienced assembler. If permits, ground conditions, or layout changes make the work difficult, plan your patio-cover project with a construction professional.
Acadiana Patios & Construction: Motorized Shades & Screens
Acadiana Patios & Construction can help match your patio-cover decision to the right outdoor living features. If you’re weighing a kit against a custom structure, its Cypress Patio Covers provide a tailored option for yards where the layout, shade needs, or house placement call for a specific design.
Motorized Shades & Screens can complement a covered patio when you want more control over the outdoor space. Concrete Slabs & Concrete Coloring can also fit projects where the patio surface is part of the plan. Considering the cover, foundation, and usable space together helps define a practical project scope.
Contact Acadiana Patios & Construction to discuss your patio-cover project and the options that suit your space.
Plan the patio space you’ll enjoy using
Choosing between free standing patio cover kits and a custom build is also an opportunity to plan how your outdoor space will work day to day. Look beyond the structure and consider how shade, access, seating, and future additions will fit together. A patio plan shaped around your routines can make the finished space feel more intentional.
Acadiana Patios & Construction offers Cypress Patio Covers, Motorized Shades & Screens, and Carports & Garages. These options can support a broader outdoor project, whether you’re planning a covered sitting area or considering shade and shelter as part of your property improvements.
When you’re ready to take the next step, contact Acadiana Patios & Construction to discuss your plans. A clear idea of how you want to use the space is a useful place to begin, and you can move forward at a pace that feels right for your project.
Frequently Asked Questions
Attached or Freestanding?
Choose attached when you want the cover integrated with the house, and freestanding when you need shade in a separate part of the yard. A structure beside a back entrance can extend the transition outdoors, while one near a pool can shelter a separate seating area. Consider where people will walk and gather before choosing its location.
Do You Need a Permit?
Permit requirements depend on the project and local rules, so contact Lafayette’s building department about your proposed design. Be ready to describe the planned location, dimensions, roof type, and support layout. These details help clarify which plans or approvals may apply. Keep the department’s instructions with your project records, and build according to applicable requirements.
How should homeowners choose between the two?
In a free standing patio cover kits vs custom build comparison, start with the site, desired layout, and assembly work. A kit may suit a level area that matches its dimensions and instructions. A custom build can better accommodate an unusual yard shape or existing features. Compare the complete project scope, including preparation and installation, rather than deciding from the materials list alone.
What Does the Kit Actually Include?
Kit contents vary by model, so review the parts list and assembly instructions to understand what is included. Then identify what the project still requires, such as site preparation or tools. For example, check that the planned support locations align with the kit layout before purchase. This comparison can reveal extra work before assembly begins.
What are the main structural differences?
The central difference is whether the design connects to the house or stands on its own frame. That affects how the cover relates to the building and yard. An attached design may suit a patio directly outside a frequently used door, while a freestanding structure can define a separate destination. Match the structure to the space’s purpose.
Which design is better for different climates?
Neither option suits every climate; the design needs to match the site’s exposure and weather demands. In Lafayette, consider sun and wind exposure along with drainage around the structure. In snowy or mixed-season climates, roof loads, beam spans, and support placement matter. A free standing patio cover kits vs custom build comparison should account for how the complete structure handles local conditions, not just its roof material.